Overview
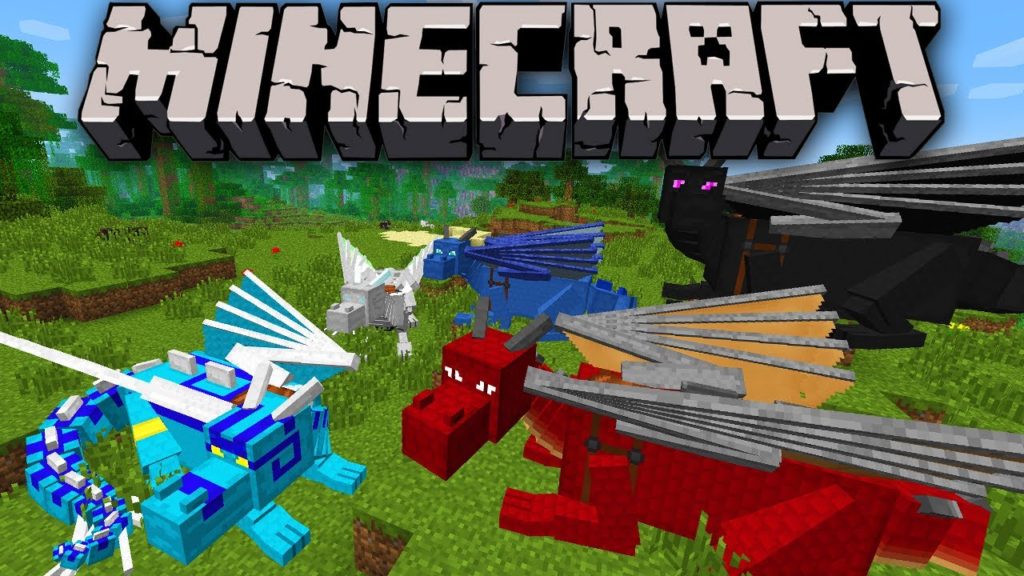
Dragons Minecraft Modpack Server is a modded Java Minecraft server run by Tristan Miu Smith and Matthew Smith and available for friends and family to join. The server uses Forge and over 70 mods to create a medieval survival world that is filled with dragons and other mythical creatures. You must install Forge and the Mods on your computer to be able to join the server. Below are the basic system requirements are the steps you will need to take to install the software and join the server…
System Requirements
- PC or Mac
- At least 5GB available memory
- Java Minecraft Edition Installed – https://www.minecraft.net/en-us/store/minecraft-java-edition
Installation Steps
- Email/IM your Minecraft ID
- Download and unpack the Dragons Modpack zip file
- Create a new Minecraft Installation for 1.12.2
- Install Forge 1.12.2-14.23.5.2854 on your PC/Mac
- Modify the Dragons Minecraft Server Installation you created in step 3
- Add the Mods to the Minecraft directory
- Connect to the server
- Play!
See below for detailed instructions for each of the steps.
Email/IM your Minecraft ID
Once you have been invited to play on the server Email or IM your official Minecraft Username to Tristan. Your username has to be pre-registered in the server for your to be able to join. Tristan’s dad manages the list and only family and friends are allowed to join and play on the private server. It is not available to the general public. You have to have a user name to be able to join the server so we can verify your identity.
Download and unpack the Dragons Modpack zip file
Download the Dragons Modpack file to your compute where Java Minecraft edition is installed. This Modpack zip file has everything you need to configure your Minecraft client to join the server. Once you download and unzip you should see the following files.
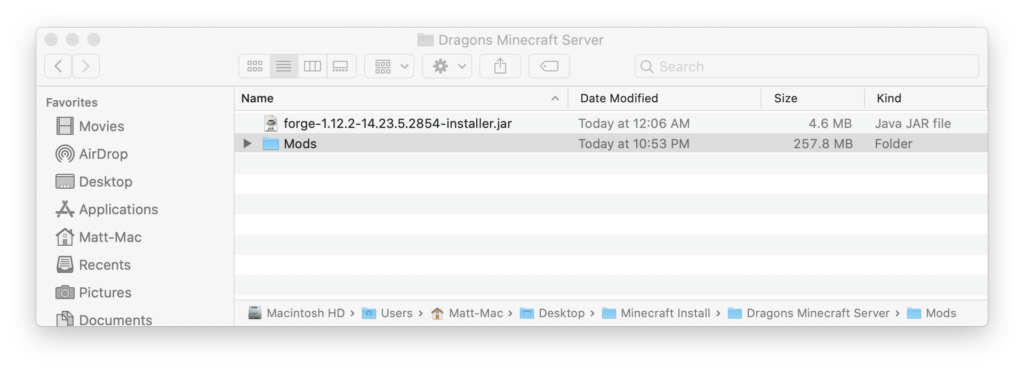
The Forge-1.12.2-14.23.5.2854-installer.jar file is an installer that adds Forge to your computer. Forge enables Minecraft to load mods. The Mods folder has all the specific mods you will need.
Create a new Minecraft Installation for 1.12.2
Forge enables Minecraft to load mods. We are running Minecraft 1.12.2 and so we need to install the 1.12.2 version of Forge. This is an older version of Minecraft but the one that has the largest selection of mods available.
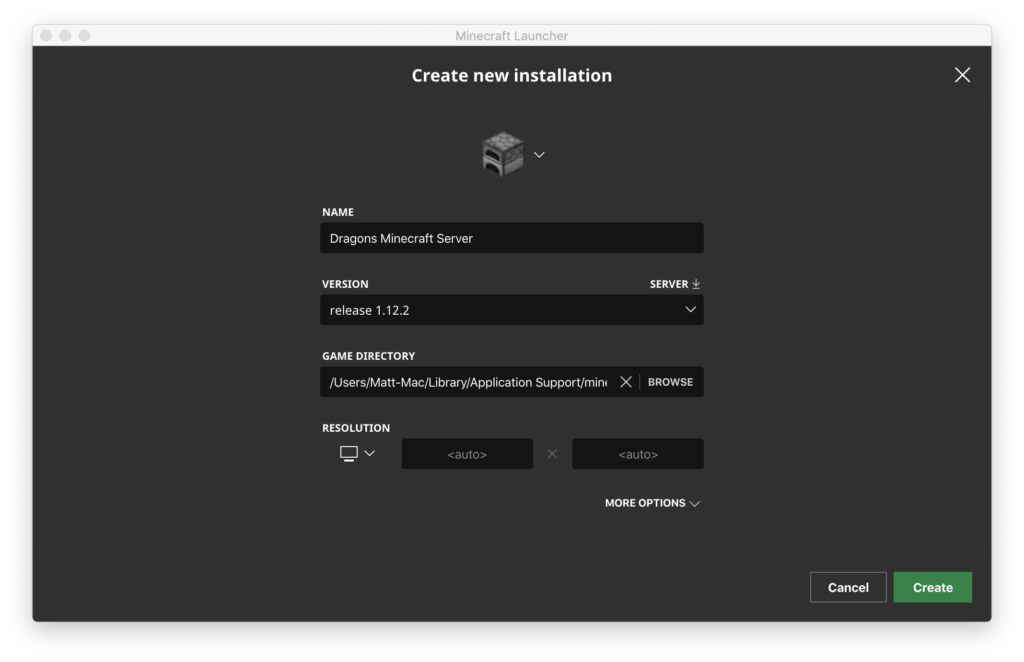
Before Forge will install and work, you have to run Minecraft 1.12.2 at least once for the version you want to install. At the same time you can create a unique Minecraft installation for the Dragons Minecraft Server so that the mods you load will only be used for this server and not your regular java latest instance or other servers you may play on. Follow the following steps.
- Open your Minecraft Java launcher
- Select the “Installations” tab and click “new” installation in the upper left corner
- Enter the name “Dragons Minecraft Server”
- Under version choose “release 1.12.2”
- Under game directory, you want to choose a different directory then the default directory so that you can store the mods separately from you other installations. On a mac if the default directory is “/Users/Matt-Mac/Library/Application Support/minecraft” then I would choose the following directory for the Dragons Server “/Users/Matt-Mac/Library/Application Support/minecraft-dragons-1-12”. The PC directory will be a little different, but the important thing is to pick a different directory than the default one and write it down.
- Hit create to save the installation.
- Hit the “Play” button for the installation you just created. This will run the “Vanilla” Minecraft 1.12.2 client. This downloads the game version and assets from Mojang making sure you have all of the required files for Forge. After running it once and letting it load all the way, close the game.
Install Forge
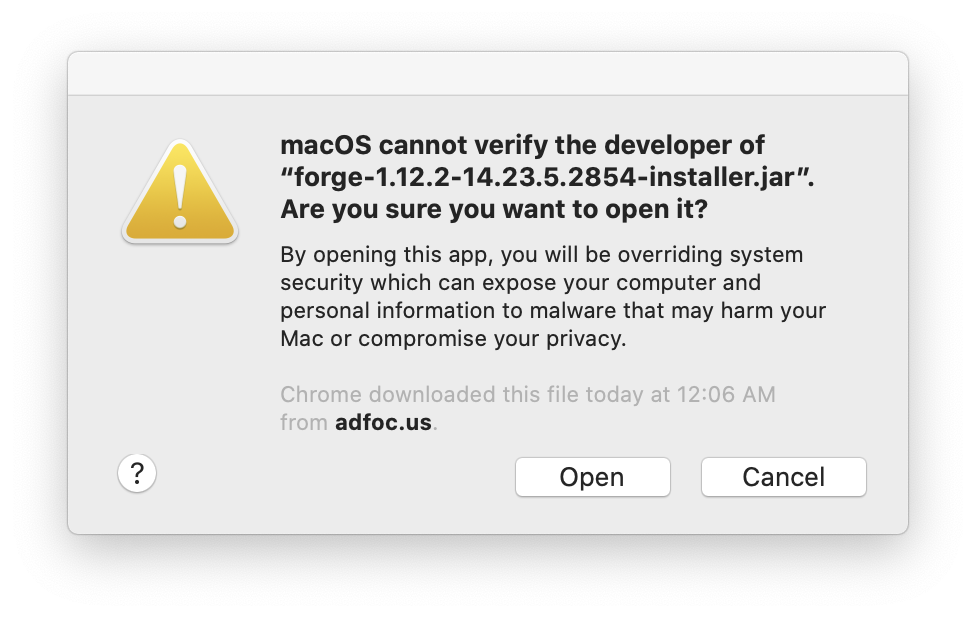
Go back to the directory where you un zipped the modpack file and right click the Forge 1.12.2 installer file and select “Open”. Note: on a Mac it’s important to right click the icon and select “Open” otherwise it will not let you run the installer. If you did it right you will see a window similar to the one below, hit open again to confirm you want to install a file downloaded from the internet. It’s okay but you have to confirm this. On Windows there is likely some similar confirmation required.
Once it opens, choose install client. It also gives you an option to choose what directory to install Forge into. The default directory should be fine. If you change the location, write it down somewhere. Run the installer.
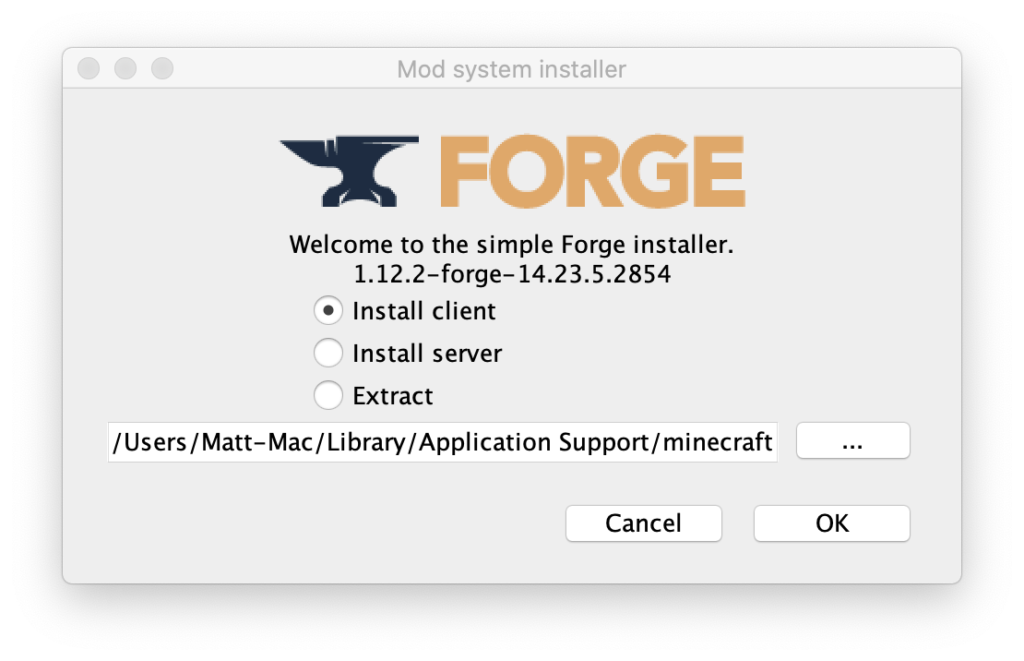
After it completes, navigate to the location where Forge was installed in the last step. You should see a mods folder as well as a few other things.
Modify the Dragons Minecraft Server Installation you created in step 3
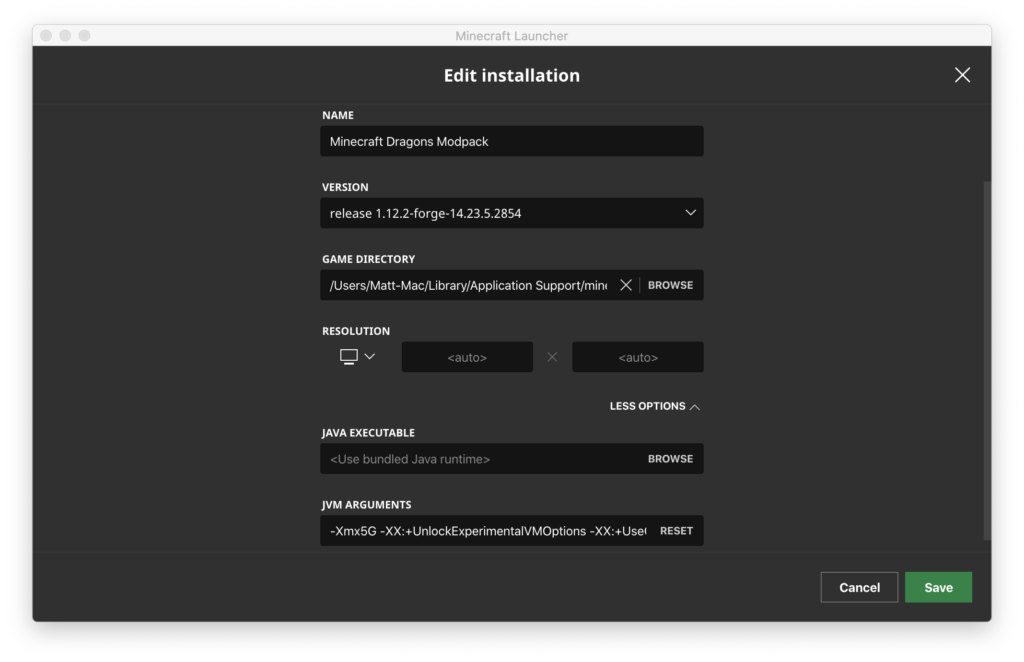
Now we need to go back and modify the Dragons Minecraft Server Installation you created earlier. Follow the following steps:
- Open your Minecraft Java launcher
- Select the “Installations” tab and click “edit” for the “Dragons Minecraft Server” installation
- Under version choose “release 1.12.2-forge-14.23.5.2854”
- Under “JVM Arguments” make sure the you change “-XmX2G” to “-XmX5G” this will give Minecraft 5GB of memory to run all the mods.
- Click Save
- Hit Play for the Dragons Minecraft Server. After running it once and letting it load all the way, close the game.
Add the Mods to the Minecraft directory
Next you need to copy all the Mods and folders from inside the Mod folder in the zip file to the Mod folder in the game directory you setup for the “Dragons Minecraft Server” installation. On the Mac will be “/Users/Matt-Mac/Library/Application Support/minecraft-dragons-1-12/Mods” or what ever you set it as during step 3. Make sure you copy all the mods otherwise you will not be able to connect to the server.
Start the Minecraft launcher again and press Play for the Dragons Minecraft Server. Make sure that the game will load. If you are asked to download any updated versions of mods do not, just hit cancel and keep going.
Connect to the server
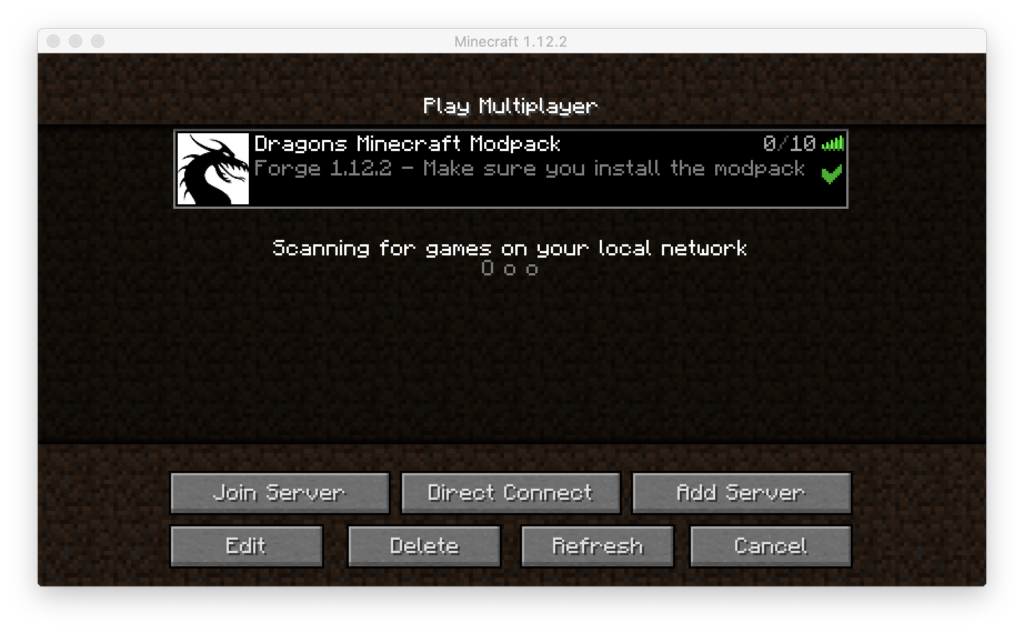
Once the game fully loads (it will take awhile to load all the mods) click “Multiplayer” to connect to the server. Click the “Add Server” button. Here is the information you need:
Server Name: Dragons Minecraft Server
Server Address: dragons.mymcnode.com
Once entered click done, then hit refresh until you get the green check. Then click “Join Server”.
Play!
Keyboard Settings
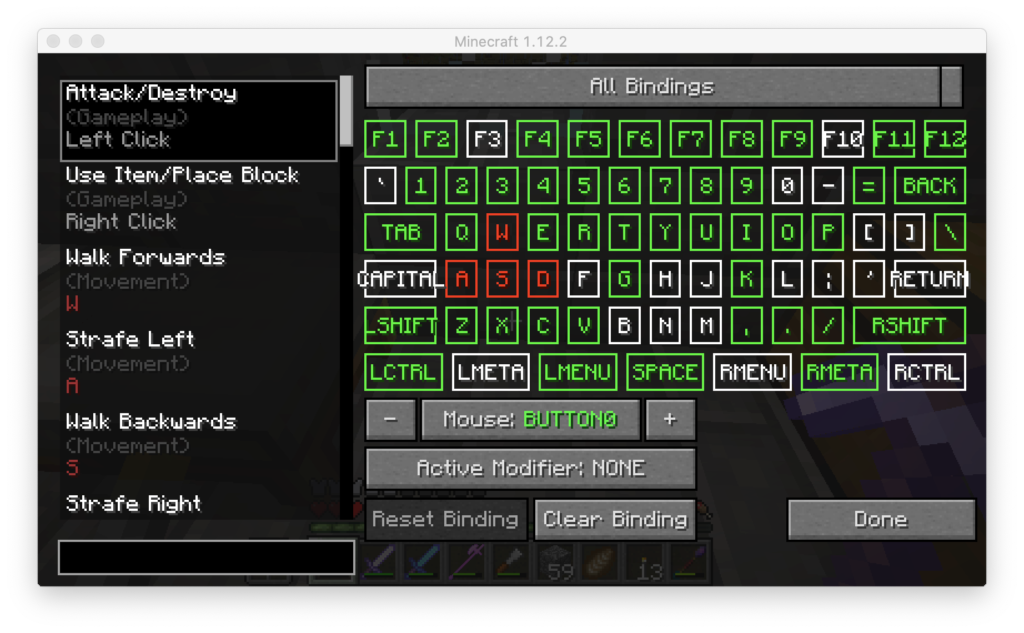
The first time you play you will want to take some time to setup your keyboard. Because there are so many mods there are many key conflicts you will need to resolve. We have included the Key Wizard mod to make this easier. If you hit escape and goto Options then Controls. You will see the Key Wizard button at the bottom of the page.
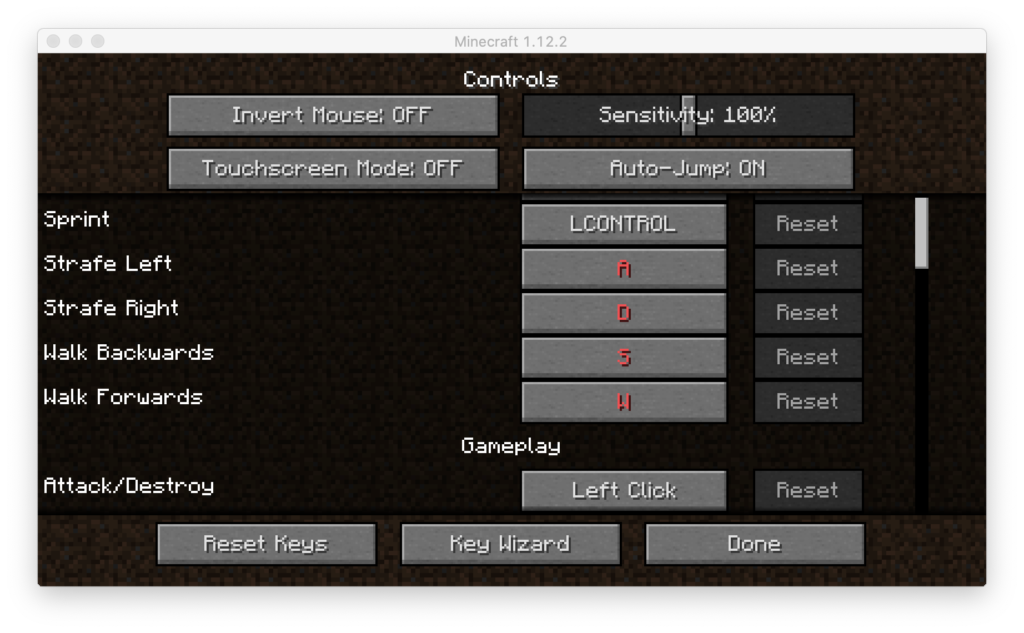
Hit the Key Wizard button and you will see a map of the keyboard – any red keys have conflicts you need to resolve. Green are used and White are free. You can also use Shift, Ctrl, etc to get more combinations.
Video Settings
In order to reduce lag, here are the recommended video settings for your client.
We are working under Video Settings currently.
Graphics = Fast
Smooth Lighting = Off
Smooth Lighting Level = Ignore
GUI Scale = Optional
Brightness = Optional
Fog = Off
Server Textures = This is optional, as it only creates lag if you accept to using a server’s recommended texture pack and it is higher resolution than Minecraft
Render Distance = Optional, the lower the faster
Performance = Max FPS
View Bobbing = Optional
Advanced OpenGL = Fast
Chunk Loading = Multi-Core
Fog Start = Ignore
Now we are under Video Settings>>Details
Clouds = Off
Trees = Fast
Water = Fast
Sky = Off
Sun & Moon = Off
Depth Fog = Off
Dropped Items = Fast
Grass = Fast
Cloud Height = Off
Rain & Snow = Off
Stars = Off
Show Capes = Off
Held Item Tooltips = Optional
Now we are under Video Settings>>Quality Settings
Minimap Level = Optional
Anisotropic Filtering = Off
Clear Water = Optional
Better Grass = Off
Custom Fonts = Off
Swamp Colors = Off
Connected Textures = Off
Custom Sky = Off
Minimap Type = Ignore
Antialiasing = Off – Must restart Minecraft to take effect.
Random Mobs = Off
Better Snow = Off
Custom Colors = Off
Smooth Biomes = Off
Natural Textures = Optional
Now we are under Video Settings>>Performance Settings
Smooth FPS = Optional
Smooth World = Optional
Load Far = Optional
Chunk Updates per Frame = Optional
Preloaded Chunks = Optional
Dynamic Updates = Optional
Now we are under Video Settings>>Other Settings
Lagometer = Off
Weather = Off
Fullscreen = Optional
3D Anaglyph = Off
Debug Profiler = Off
Time = Optional(only effective in creative mode)
Fullscreen Mode = Optional(Default is usually best)
Autosave = Optional(Default 3min is recommended)
Those are the basics of set up. Enjoy!